Blog Moving!

October 4, 2011

Dear Readers:

Well, we’ve been at this address for over a year now, but it’s time for us to move to another site. You can now visit us here: http://marginofvictorygames.com

Please update your bookmarks and RSS aggregators as soon as possible; we want to keep our loyal readers! We’ll keep this announcement up for about a month, and will then dismantle this site.

ALSO, if you link to us from your blog, we’d appreciate it if you’d update as soon as possible. Thanks!


Commands and Colors: Napoleonics—The Best C&C Game Yet?

September 25, 2011

(Folks, let me open by stating emphatically this is not a review. We don’t do reviews at Margin of Victory. Rather, this is a simple explanation of why I believe Napoleonics to be the best Commands & Colors game yet published.)

I’ve only played five games of Commands & Colors: Napoleonics. And yet already I know it to be a more interesting game than its cousin, Commands & Colors: Ancients, which I played the heck out of between 2005-2008.

The same card-driven mechanic is in play here, as are the left, center, and right divisions of the battlefield. Light, medium, and heavy units are now infantry, cavalry, and artillery units (all of which have some weaker and stronger versions). So on the surface, it’s basically the same game, just with a few tweaks. What’s amazing is that Richard Borg gave players more choices in Napoleonics without making the game much more complicated.
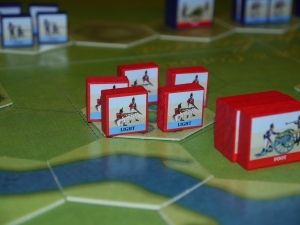
Look familiar to some other games you've played?

The three important additions are Napoleonic-era tactical decisions:

Cavalry Retire and Reform: In the face of an infantry melee attack, cavalry may evade. This works exactly the same as evasion in Ancients, it’s just that only cavalry get this option now.

Form Square: In the face of a cavalry melee attack, infantry may assume a square formation. The defending player must have a random card taken from his hand, which is then placed out of play until his unit resumes its usual formation. Attacking cavalry may only attack with one die, regardless of other benefits. The infantry battles back with one die, but if they score a retreat result on the enemy, the cavalry must move one hex away from the square (a “bounce flag”). This formation is great if your infantry get cut off and are on their own. It’s a very tough choice if they are facing both enemy cavalry and infantry, as their ability to defend themselves against the infantry is vastly reduced.

Combined Arms Attack: While attacking, you may order one cavalry/infantry AND one artillery unit to attack at the same time. You roll the normal melee dice for the cavalry or infantry unit, but you also get to add the ranged combat dice of the artillery unit in the same roll. Yup, you might be rolling 8 dice in a massive assault.

On my first read through of the rules, I didn’t think these tactics would change the flow of the game much. But about halfway through my first game with General Rick of the allied army, it was clear they were going to matter quite a bit.

In the Rolica (first position) scenario, a unit of my French light infantry found itself way out ahead of the rest of my army. Having taken earlier losses, they were at half strength and facing British heavy cavalry and line infantry. Rick ordered both units and chose his cavalry to attack first. I formed square, knowing I would likely survive the attack but also realizing that my troops would get cut to ribbons by the line infantry attack a moment later. However, if I had not formed square, his cavalry likely would have destroyed my unit, received a bonus move, and received a bonus attack against another unit. So while I lost the unit to the second attack, I denied him a breakthrough.

The game ended when General Rick executed a perfect combined arms attack. Using cards that allowed his units to move extra hexes, he arranged it so some British artillery was on a hill, firing directly down on my troops (whoops!). Then he brought some line infantry up, ordered both units, and crushed my line in a devastating combined arms attack. He rolled 8 dice in one mighty attack (4 for the line infantry + 4 for the artillery firing at point blank range). Needless to say, this caused one of my full-strength units to magically transform from neat rows of blue-coated musketeers to a pile of corpses and, alas, my French lost the battle.

I enjoyed Ancients, but I like Napoleonics even more. I feel like I have more tactical decisions to make, and thus more control over the battle. Once I factor in the varied landscape in each scenario (no more featureless plains like in Ancients) and the specialized units (rifle infantry! horse artillery! cuirassiers! oh my!), I think I’ll be playing this game for a long time to come.
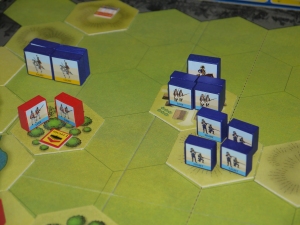
"Uh oh. Form square? Stay in line? Either way, I think we're screwed, guys."


Commands and Colors: Napoleonics Storage Solutions

September 15, 2011

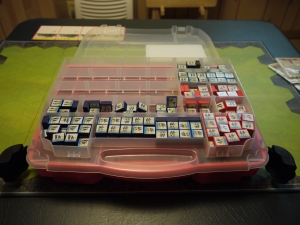
Having spent about four hours this weekend applying stickers to the blocks for Commands and Colors: Napoleonics, I was faced with a problem: where to store them all. While it’s true that the pieces all fit inside the game box, it’s a tight fit if you bag each individual unit type, which means finding another storage solution. After digging around a bit on the web, I settled on buying a Plano LockJaw box. I found one for sale at my local hardware store. The top portion of the box fits the Portugese, British, and French infantry with plenty of room to spare for an expansion or two:

Plenty of space left over!

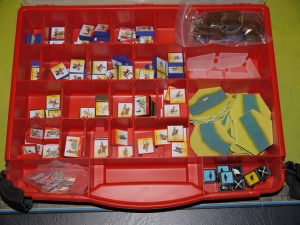
Meanwhile, the bottom portion can easily be arranged to fix the larger pieces–cavalry, artillery, and leaders–as well as dice, terrain, and chits. If I ever purchase an expansion, it will be easy to transfer the last three items to the original game box. This should leave space for expansion playing pieces.

Open the lid, and you've got all large playing pieces with room to spare for terrain, etc.

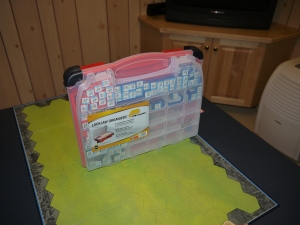
Once you lock everything up, you’ve got a lightweight, organized carrying case for all of your armies. I think it will drastically cut down on setup time for this game.

Who knew you could carry the great armies of Europe so easily?


How I Learned to Stop Worrying and Love Losing

September 7, 2011

With Labor Day weekend over, it is time to regretfully close the book on summer. Camping, grilling, brewing, mowing the lawn: Every day was filled with joy. That is, until I sat down in the evening to play a board game with my wife, friends, or family.

And then I lost. And lost again. And then lost some more.

Like my beloved but hapless Minnesota Twins, I spent most of the summer getting thrashed by the opposition. If you’ve been following the blog for a while, you’ll know that every Memorial Day I declare a “summer of victory.” You may also remember that last year, the Summer of Victory III, didn’t go so well. However, it was nothing compared to the utter debacle that was the Summer of Victory IV: Actually, the Summer of Defeat, Don’tcha Know.

The overall number of games played went up slightly this summer, 43 compared to last year’s 38. Of these 43, I went 14-29, a .325 win average. This is a huge drop compared to last year (.447 average). In two player games, 26 in all, I went 14-12, again a huge drop off from last year, when I was 15-1-2. I attribute this to the fact that I was playing my wife a lot more, and she has proved stiff competition this summer, winning 8 of our 14 games.

The most popular games of the summer of loss were Hive (11 games played) and 7 Wonders (7 games played, no lie!). These are also the two games that Sara and I purchased together this summer, and we played them a lot. And it seems 7 Wonders is the new Carcassonne for me, as I have not yet won a single game of it. On the other hand, I finally snapped my 17 game losing streak in Carcassonne, winning for the very first time in the two years I’ve owned the game! That was a small bright spot.

In the end, I think this was a summer during which I learned to “stop worrying and love losing.” I don’t mean that I’m trying to lose, but that it doesn’t bother me like it used to. I’m much more focused on playing games that provide a bit of fun and some tough decisions as well, but even more importantly, I am enjoying the company of those with whom I’m playing.

A warmer, fuzzier John? Perhaps. But I’m still declaring a Summer of Victory V next Memorial Day!


PBEM v.s. Jason of Point 2 Point, Late 1758…and the end.

August 29, 2011

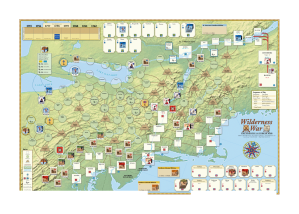
Over the course of the summer, Jason from the Point 2 Point podcast and I continued our leisurely but regular pace in our Wilderness War match via PBEM. You may remember that I cut the French turn down to size  in the first turn and consolidated my gains in the second turn, but a daring foray by Jason into New Hampshire set me back on my heels a bit in the third turn. However, things started looking up in late 1758.

1758 Late Season Hand (British)
Provincial Regiments/2, Cherokee Uprising/3, Fieldworks/1, Ambush!/1, Call Out Mililtias/1, Northern Indian Alliance/2, Colonial Recruits/2, Stingy Provincial Assembly/2, Mohawks/1

(Similar to turns two and three, I have no British regulars coming across the pond to help me. Looks like my provincials will have to make do with some Mohawk allies. I begin to despair of ever making substantial gains.)

We open the second half of the year with General Levis and his French army hightailing it for the Green Mountains to avoid getting attacked after their dastardly foray into New Hampshire (which put Jason up to French +1 VP at the end of last turn). I play a card and activate General Monckton, who again misses his opportunity to breach the thick walls of Louisbourg (now renamed Minas Tirith in my mind).   Then panic strikes me and my hardy British troops as the French land their reinforcements at Quebec! This means I’ve got a decent sized force breathing down my neck.

But then…annus mirabilis indeed! I make one last desperate push to take the Impregnable Fortress of North America ™ and…Monckton gets the job done and TAKES Louisbourg. The British rejoice (+3 VP to me) and my lobsterbacks are now up 2 VP. Jason sees the writing on the wall and leaves one regiment at Quebec as a speedbump as the other two join his main force at Ticonderoga. He then moves my provincial assemblies to supportive from enthusiastic to stop any further British provincial regiments from being raised. In the meantime, the Mohawks ally with the British. I plan to do a bit of raiding up north if I can spare the cards.

A bit later, General Levis heads back into New Hampshire to beat up on Loudon, one of my worst generals, and a lonely detachment of British regulars. I’m thinking he’s hoping to take another stockade and defeat my troops in battle to boot. I let him move into my space, call up the militia, and play Fieldworks in a desperate attempt to fend him off. Jason rolls the dice, checks the results table and sees that, yup, my worst general just beat his force (British now at +3 VP). They retreat in shame, and Jason concedes the game, knowing it’s pretty tough for his French to snatch up 4 VP in two more hands.

And thus ends our blog v.s. podcast smackdown. It was a lot of fun, but I will admit that a lot of card draws and dice rolls went my way. Jason is a good-natured and talented opponent, and I greatly appreciate him taking time to play me. And there’s already talk of a rematch…

The last battle. While I feel sorry for Jason, I did have to laugh at his consistently bad dice-fu. Nothing can explain it

The final map. The British take Louisbourg and only inch up the Hudson Valley corridor, but it's enough to send the French a-runnin'.


Giant Fighty Robots!

August 19, 2011

Russ and I are playing with the BattleTech quickstart rules tonight. Giant Fighty Robots, activate!

Lazers! Die, evil Russbot, die!


PBEM v.s. Jason of Point 2 Point, Early 1758

July 26, 2011

Well, it seems Jason from the Point 2 Point podcast and I have hit a leisurely but regular pace in our Wilderness War match via PBEM, finishing a turn every three to four weeks. I achieved some substantial gains in the first turn and consolidated them in the second, but the early campaign season of 1758 turned out to be a head scratcher of sorts.

1758 Early Season Hand (British)
Campaign/3, Western Indian Alliance/2, Coehorns and Howitzers/1, Bastions Repaired/1, Rangers/1, Northern Indian Alliance/2, Indians Desert/2. Amphibious Landing/1, Call Out Militias/1.

(Like last turn, it seems that the reinforcements have largely dried up. Still, I should be able to get a lot done with this hand. I held the Amphibious Landing over from last turn, so let’s try that out.)

Jason opens by playing British Ministerial Crisis, hoping to snag a reinforcement card out of my hand and drop it in the discard pile; as I don’t have any, this has no effect. Breathing a small sigh of relief (I just know that next hand I’m getting tons of reinforcements), Wolfe moves north at a cautious pace, heading first to Hudson Carry North to link up with a small garrison left there over the winter. Jason tries again, playing Smallpox on Wolfe’s force. Unfortunately for him, he rolls a 1 and I only reduce one of my units. My response is to raise another regiment of rangers at Hudson Carry North and quietly chuckle over his bad dice rolling.

A bit later, Montcalm and force move south to Ticonderoga. I raise Northern Militia, hoping to beat back the raids I imagine will come at some point. However, Jason shifts his focus to the western frontier and Indian raiding parties start  filtering south. To combat this, I build stockades in Easton and Concord. Eventually a few raids are launched against my string of stockades, but Jason’s bad dice rolling continues and they fail. Using the campaign card I received at the start of the turn, I move Loudon and a small force from New York to New Hampshire to help with border defense. I use the other half of the campaign card to activate Monckton in Halifax. His small army performs an Amphibious Landing and lays siege to Louisbourg, where there are no troops but there is one leader, Drucour. In previous games I’ve never seen the French player sacrifice a leader in a siege, but here it makes sense: Louisbourg’s fortifications already mean I’ll be rolling on the siege table at a disadvantage, and the wily Drucour makes it even harder.

However, I have an ace up my sleeve…Coehorns and Howitzers. I reveal this on the next card play and hope my doughty Britishers can batter down the fortifications. Unfortunately, it doesn’t quite turn out that way, and Monckton’s force ends the year outside the city. And it is here, my friends, that I had made my mistake. I had two card plays in the season that were actually double card plays: first the Campaign which required me to also play Amphibious Landing, and then the activation of Monckton’s besieging force with the Coehorns and Howitzers card played alongside. This left Jason with two cards and no threat of a British response.

So he did something quite dastardly; he detached Levis and a small force from Montcalm’s  huge army at Ticonderoga, marched east, tromped into Charlestown, NH, and burned a stockade to the ground. And Loudon, who was also in the area, did nothing. Typical.

We ended the turn at +1 French VP. And I wept big salt tears, shook my fist at the sky, and swore revenge…

The map mid-way through 1758. Click for more detail.


Stop Reacting, Start Acting!

July 13, 2011

You are in the presence of wargaming greatness. Really.

Okay, maybe not. But perhaps you’re in the presence of gaming competency. And that’s probably enough for this post.

Feel like you’re constantly sitting down to two-player wargames and losing badly? You’re in luck; I’m here to encourage you, dear reader, to switch things up a bit. Stop staring at the rules, trying to find a loophole. Quit complaining about how the dice are against you. Man (or woman) up and start winning some games. “But how?” you might be asking yourself. It’s simple. Stop reacting and start acting. This might seem a trivial piece of advice, but understood properly, it will make you a winner–in board games anyway.

I find the wargamers who consistently win have two key talents. The first is that they are good at assessing the circumstances in the game at any given moment and acting in such a way that their opponents feel forced to respond directly. The second is that when they are pushed back on their heels a bit, they respond to pressure in a fashion that actually turns the tables on their opponent. These two strengths combined mean that their opponents feel increasingly stressed out as a game goes on, they make bad mistakes, and they eventually lose.

So, how do we become winners? Here are three tips that I’ve received over the years that have helped me to hold my own in wargames:

  1. Have a strategy and be willing to change it: Sitting down to a two-player game, it’s easy to spend a few moments looking at the setup and your resources in order to determine a certain path to pursue. Equally important is reassessing that strategy every turn. Ask yourself, “Is this still a viable path to victory? Does it need changing? Does it need to be abandoned?” Otherwise you end up sending good resources after bad.
    Example: In a recent game of Manoeuvre, I decided to make a hard drive for the left side of the map where there was some nice terrain. When my opponent occupied it first, I slowed down the tempo, stayed out of his range, built up a strong hand of cards, and took the positions from him.
  2. If you’re losing the initiative in one area, focus on another: This is not to say you should abandon certain areas of a game if you think you’re losing. But you need to be willing to accept setbacks in one area in order to make gains in another. Devoting some resources to another area of the board will force your opponent to consider it. He will start to doubt himself.
    Example: In Twilight Struggle, you as the U.S. player quickly realize you’re getting beat in the Middle East. Instead of throwing everything at the region, you accept that you can’t wrestle back total control for the time being. Instead, you shore up what gains you have made in the region and start quietly placing influence in another region, let’s say Africa. Now your opponent gets to divide his attention between his baby, the Middle East, and your push into Africa. “What’s he doing over there? Is there something I’m not seeing?” your opponent starts to think.
  3. Execute a riposte when you can: A riposte is a move in fencing. It’s an offensive attack delivered immediately after you successfully parry an opponent’s attack. The intent is basically to catch your opponent off guard because your response is so quick. Some gamers tend to be cautious people–they fend off an attack by their opponent, but they follow it up by moving very slowly. I find that the moment after a successful defense is exactly the right time to play a little fast and loose and take a risk. Execute a counter-attack, open up a new offensive somewhere. In short, double your opponent’s sense of frustration over his failed move by pushing him back on his heels a bit.
    Example: In the World at War series, I find that the best time to take new territory is immediately after beating off an opponent’s assault. Take out a few tank platoons, but then take a new position. Move closer to the objective. You get the drill.

Got any tips of your own? I’d love to hear your comments!


Some Thoughts on PBEM Gaming

June 28, 2011

Looking back over my board game records, it’s clear that I haven’t been playing a lot of games in the past few months. There are a lot of reasons for this: my wife working in the evenings, shouldering new new personal and professional responsibilities, other hobbies like roleplaying and homebrewing taking a front seat, etc. But with a bit more time at home this summer, I have been picking up a few play-by-email (PBEM) games; I mainly play these turns when the baby is taking a nap, or in the late evening once she’s in bed. These online games include the Blog v.s. Podcast Smackdown previously mentioned, as well as a few different games in the engrossing and delightful Combat Mission series of computer games. Still, if I had the choice, I’d stop PBEM gaming and stick with face-to-face experiences instead; online gaming is sort of like caffeine-free, diet soda–it’s a paltry substitute for the real thing! However, online games still have their place in the way I approach the hobby:

Learn a Game, Learn New Strategies: Since I really got into boardgames five years ago, this is what PBEM has been all about for me. I post a message on a forum looking for someone who knows the rules cold so I can learn from them. This is how I came to understand Wilderness War and Here I Stand, two games that have a pretty steep learning curve. Then I take the lessons and bring them back to my own local group. Incidentally, sometimes I have ended up paired with some really talented opponents who have shown me new strategies.

Engage in a Competition: When there just aren’t enough folks around to justify a local tournament of sorts, I head to PBEM gaming. I was able to participate in a Here I Stand tournament this way (and got past the first few rounds!), and also participate in several Combat Mission tournaments. Again, the level of competition is fierce and I end up learning a few new tricks to bring back home. This can lead to revitalizing our local group’s interest in a game too.

Keep a Gaming Connection Strong: Living where I do, some of my gaming buddies are pretty far away. (Russ, for instance, is a 45 minute drive away on a good day!) So a PBEM game allows us to keep playing something even when circumstances keep us apart physically. This is true with my dad too; we’ve played a lot of Combat Mission over the years because playing it in “hotseat” mode takes hours, but PBEM is five minutes a day.

In the end, I greatly prefer the social interaction of a face to face game. Play by email will always be a distant second to it, but it can be helpful. I think it makes me a better gamer, but even as I described my three reasons for online play above, I realized that it all comes back to my local group and my friends.


PBEM v.s. Jason of Point 2 Point, Late 1757

June 20, 2011

With only a few interruptions, Jason from the Point 2 Point podcast and I continue our Blog v.s. Podcast smackdown. The first turn saw some substantial British gains, but nothing is certain in war!

1757 Late Season Hand (British)

Massacre/1, Amphibious Landing/1, Amphibious Landing/1, George Croghan/1, Raise Regiments/2, Governor Vaudreuil Interferes/3, Courier Intercepted/3, Call Out Militias/1, British Politics/3

(This turn I have a few more high cards to move around my slower generals. However, I’m missing any reinforcements from Britain…well, I think it’s rinse and repeat this turn; head up the Hudson Valley and do some damage.)

On the first play, Montcalm comes raging back south and his sappers remove my Fieldworks at Hudson Carry North. In a straight up battle (28 British strength points v.s. 31 French, Wolfe v.s. Montcalm), I defeat the French forces but don’t manage to kill any leaders. +1 VP to the British. Then I raise some provincials to make sure Wolfe is one column higher than Montcalm’s force on the combat results table.

A bit later, Jason allies with some Western Indians, while I bring Dunbar and his forces north to Hudson Carry North to make absolutely sure I can whomp on Montcalm. However, he replenishes some of his depleted units with a reinforcement card, which causes me to nix that idea. Realizing I’m likely not going to be getting further VPs this year, I concentrate on border defense, building stockades and raising northern militia as Jason starts sending Indians down to the Southern Department to raid.

Luckily, I beat off his Indian raids and decide to take a calculated risk–I send Wolfe and company north to Ticonderoga, hoping to take it from the French before year’s end. The French successfully raid and burn a stockade in Easton, but Wolfe takes Ticonderoga with no problems. +2 VP to the British. The season ends with Montcalm repairing to Quebec, and Wolfe to Albany. I elect to hold onto my last card so I can use it in Early 1758.

As 1757 draws to a close, I reflect on the fact that I’ve done pretty well considering I only had 1 infusion of British Regulars in 18 cards! I won two pitched battles and took a French fort, dropping the 4 VP gain the French begin with to 0. In addition, my raid into New France negated the only VP gain Jason was going to get by the Easton raid. But who knows if the gods of war will smile upon my hardy redcoats and provincials in 1758…

The map at the end of 1757. Click for a larger image.